It All Begins With Your Computer

Yes, it really does begin with your computer, not your camera! If you scroll down just a little, you'll see a white box. In the white box, I've provided easy-to-follow instructions on setting up your computer... Just click 'print' and then follow the instructions for your operating system (XP or Vista). Then return here!

Where Do I Begin? - Print This First! Then Follow Along

Tuesday, June 1, 2010

I Have No Pictures Organized...paper or digital - Help!

I got an email from my good Theresa asking this question and the answer was too long for a Facebook response. So, you all get the answer!

What program do I use to sort and organize my photos. The good news is, if you're a PC user, you already own it!!! I just use windows explorer to organize my photos. If I were starting from scratch, I would do the following:

Start with your paper photos:
1) Get envelopes for each decade you're working with and put the photos in the appropriate decade.
2) After that's done, get 3 envelopes (one for early decade, middle decade and late decade)and put them in each decade envelope. You really don't need to go more detailed. In 100 years, whoever is looking at them will just be glad to know roughly when it was...wouldn't you if you found a 100 year old photo of your ancestor!3)

From this point, you could create a traditional paper/scissors sort of scrapbook, but I would strongly suggest you rethink that and scan and go digital. The reason being that you can duplicate any book you make easily and share what you scan with everyone. So....

1) Start with the oldest decade and scan each envelope, putting them in identical folders in windows (see my first blog on this site)

c drive
my pictures
1960
early
middle
late
1970
early
middle (you get the idea)

For Digital Organizing:

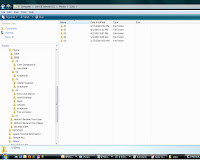
You'll do exactly the same thing. Create folders in Windows Explorer with decades. If your photos are recent enough that you know the year, you can put a folder for each year under the decade and sort that way.

Double click on the picture to see a screen shot of my folders on my PC


LABELING PHOTOS;

1) If you right click on any photo in Windows Explorer, you can add descriptions (place, date, name of person, etc.) This makes it easier when giving copies to family for them to find what they're looking for, i.e., My sister, Cathy wants to find all the photos of her in the 1960s. She can just do a search in Explorer and up they come!

Please post any questions you might have! Good luck!

Tuesday, May 18, 2010

Lightroom Don'ts By Lightroom Killer Tips Site

I found this on one of my favorite sites this morning and thought it would helpful to those of you who use Lightroom! Visit the site listed as there are so many wonderful tips - all the time!

5 Common (or Potential) Lightroom Slip Ups
Killer Tips Blog // 47 Comments
It seems every article these days has to have a number attached to it. You know what I mean right? The 5 Most Common Something-or-others. 10 Reasons Not To Do Something-or-other. 25 Websites That’ll Make You Something-or-other So I figured I’d join in with a few FAQ’s and little slip-ups that I’ve seen from fellow Lightroomers lately. Here goes:

1. Moving photos while not in Lightroom
This is by far the biggest slip up that I see or hear about. If you move, reorganize or do anything to your photos outside of Lightroom then you essentially break the connection that Lightroom has to them. If you want to move your photos to another folder or hard drive, then do it from within Lightroom. It keeps things intact and keeps Lightroom in the know about where your photos live. If you want some more info on the topic, then watch a video I did about folders and hard drives a while back.

2. Reimporting your JPG exports
Here’s one that, for some people, makes sense. But for most of the Lightroomers I run into, it just tends to confuse things. When you export your JPEG photos from Lightroom there’s an option to reimport the JPEGs back in to your catalog (watch a video to see how). If you absolutely need a fast reliable way to be able to send a client exactly the JPEGs that you sent them the first time then maybe this option makes sense (barely though). In reality though, you’re pretty much polluting your catalog with a bunch of stuff that just gets confusing. If you don’t fall into a category where you constantly wish you just had those same exact JPEGs you exported a while back, then a good Collection workflow along with the File > Export dialog should keep you from having to worry about the final JPEG files. They don’t need to be in your catalog because they’re just a click away if you ever need to create them again.

3. Resetting a photo’s settings just to see it in a different way
This one sounds a little weird I know. Bus I’ve see a lot of people develop a photo a certain way in the Develop module. Then at some point, they’ll want to see it with a different effect or as a black and white (or some other “look” than what they currently have). So they undo or reset the photo and apply the effect. But what they really want are versions. They want to see their photo one way, and then maybe as a B&W and maybe even as a sepia tinted photo or something similar. In that case, Virtual Copies are the key and really easy to use. Here’s a quick video where I show Virtual Copies and a really cool way to use them.

4. Not using collections
Folders are where all of your photos go when you import them. Collections are where your good photos should end up. And the fact that Lightroom 3 now has the Collections panel in all of the modules makes them a no-brainer. Use Collections to sort your best photos. Trust me. It’ll make life a lot easier. Here’s a quick write up that Scott Kelby did that talks a little more about a good Collection workflow.

5. Thinking that Lightroom has a color space you can change
Lightroom’s color space is ProPhoto RGB. Plain and simple. You can’t change it. That’s the way it is. Now, that doesn’t mean you’re stuck with ProPhoto for everything. You can of course choose what color space you want (sRGB, Adobe RGB, etc…) when you head over to Photoshop. Check this video out if you want to learn more about it. Don’t forget, you can also choose what color space you want when you go to File > Export to save your photos as JPEGs.

Bonus: Not deleting your backups.
I could have named this “6 Common Lightroom Slip Ups” but 5 just sounds cleaner So here’s a bonus. If you’ve got Lightroom’s auto backup setting turned on then you may likely have a ton of backups in the LR backup folder. But do you need all of those backups? Probably not. They’re really just there in case of an emergency and if that emergency need ever comes up, you probably just want the most recent backup right. Sure, there are probably people who may want a backup from an exact certain day, but that’s the minority. So go into that Backups folder periodically and delete the old ones.

If you’ve got any others to add (or feel particularly strong about one above) feel free to post it here as a comment. Thanks

Wednesday, January 20, 2010

COOL LIGHTROOM FILTERS!


As you notice while looking through my photography blog, I love to throw in an occasional 'filter', black and white, aged photo, hanne-split tone, etc. These are are available for free from the following sites:

Adobe Killer Tips for Lightroom

Presets from Jack Davis

Directions for downloading and installing in Lightroom are included on the Killer Tip site. If you have problems, please email me!

You can also Google, 'presets for lightroom' and see what comes up. These are constantly changing and most are free. I saw a photo that my daughter, Tiffany, had used a preset on and I didn't recognize the filter! What? I know ALL the filters! Well, I hadn't been on the Killer Tips site for a while and there were tons of new cool filters to try.

A few words of caution:

* You can overdo it with filters. Don't filter EVERYTHING!
* Not all filters work with every photo
* Always make a copy of the photo you're working on (right click on the photo and click on 'create virtual copy') and THEN use a filter!


My favorite filters:

*Aged Photo (great for almost any photo)
*Black and White - High Contrast
*Matt's Summer Haze - (great for beach shots)
*Glow -(softens the focus)
*300 - (Awesome on photos using stone and one or two colors...think bridal gown set against stone or wood)
*Hanne-split tone - (wonderful for photos with lots of blues or a portrait of someone with blue eyes.) This filter blows out the whites a little, so you'll have to use the recover slider on the right to bring them back.
*Sin City -(great if there's lots of red and no much else in the photo)

Monday, November 2, 2009

Adobe Lightroom Beta 3 - Free Download

I LOVE Adobe Photoshop's Lightroom! It's a digital darkroom created by photographers for photographers - both serious amateurs and professionals. For anyone that takes a lot of pictures (I'm thinking about the Martins, Sewells, Fegals, Brinckleys, etc., you know who you are...) it's a must-have, can't-live-without, make-your-life-easier software program! For more information see my in-depth blog below.

For example, I just finished a wedding recently and imported over 1200 pictures - at once - into Lightroom. In less than 10 minutes, they were loaded and ready to be tweaked. I could never get Photoshop to handle that many photos open at once.

Adobe is currently running a beta test for Version 3. This means that ANYONE can download it and give it a try! I can't wait for the new version! If you love it, I would wait to purchase it until the regular version comes out. I started with version 1 and it wasn't upgradable to Version 2...I had to purchase Version 2 outright again. I'm hoping this will not be the case with Version 3, but you never know!

I'd love to know your thoughts on Lightroom if you currently use it and if you decide to give the Beta Version a try, please let me know what you think!

Monday, October 12, 2009

I'm Organized...now, What Photo-Editing Software is Good

I've had quite a few friends that have expressed an interest in purchasing Adobe Photoshop CS4. Now, I LOVE Adobe Photoshop CS4, but I always ask them what they are going to use it for. Their answer is always - to fix my pictures...the exposure, the color, etc.

STOP... This is like buying a Rolls Royce when a bicycle would get you to the corner store just as well.

Photoshop has another product that is meant specifically for photographers to tweak your photos. It's called Adobe Photoshop Lightroom

BENEFITS:

1) Less Expensive $299 (unless you're a teacher or have a student. Then it's $99)
2) Soooo much easier to use! The learning curve is very quick
3) I can import 1000 photos from a recent wedding and it takes less than 10 minutes. Try that with Photoshop - you're computer will freeze! (Realize that the speed of upload depends entirely on your computer's processor speed and RAM. I have an Intel Core2 Quad 2.4 GHz with 6 GB of Ram...most of you won't have this - but since I'm a photographer and deal with 1000's of photos a month, I need the speed...you probably don't.)
4) I can add keywords and rating labels to my photos, which then show up in Window's Explorer - making it easy to search for photos later on.
5) I can export the photos all at once - Whoo Hoo!!! I realize that Photoshop can batch process, but honestly, it took me so long to learn to do it, I gave up!
6) My favorite benefit is the ability to add 'filters' to my photos (not only b&w, but aged photo, hanne split-tone, 300, new mexico road, etc., etc.) All are free downloads from the internet.

CONS:

1) You'll love the program so much, you might not get around to making dinner or cleaning the house.

Sunday, October 11, 2009

Linda's List of 'Why I Went Digital'

My good friend and fellow 'Creative Memories past unit leader,' Linda, went digital with her albums awhile ago. I asked her to give me her reasons for making the change! Thanks, Linda!

-Faster!
-Can look professional or very artsy-craftsy – your choice.
-My husband loves it – no mess!!
-Seriously – when you are finished, all you do is walk away from your computer.
-Make one album; share with many; easily duplicated. How many times have you made an album to give away – then later wished you had a copy for yourself? Copies are free if kept digitally; or only the cost of the book if you reproduce it – but NO EXTRA TIME is involved!

-Less expensive.
-There’s sooo much digital “stuff” available – and it’s all reusable!
-Digital “stuff” is usually less expensive than paper “stuff” – AND (did I say) it’s re-usable?
-There is a wealth of free “stuff” available online!!
-Make a page for one child; change out some pictures and have a page for another child.
-Never run out of adhesive at midnight!
-Never come up short on a particular paper!
-No storage space needed for supplies. No cost for storage containers!
-Easier to organize “supplies” and so easy to find what you want.
-Can resize photos to fit page: need it bigger - no problem; need it smaller but really don’t want to crop out Aunt Suzie – no problem!!

-Photos can be enhanced, edited, cropped, shaped.
-I love the fact that when I’m doing a digital page, if I decide I want to add another photo, I can do it NOW; I don’t have to wait to have another photo printed.
-No photo printing expense. No leftover photos not in books (unless, of course, you choose to print some to have on hand!).
-Easy to add text; easy to correct errors and space the text on a page.
-Ability to include more journaling than when handwriting it.
-More font options for journaling; many even look like they are handwritten! Can you write 40 or 100 or 200 different ways?

-More book options, including professionally bound books that take up less space on your bookshelf.
-If you see a paper you just have to have, buy one sheet, scan it, save it, use it 100 times!!
-I thought I might miss the “creative outlet” I had with paper scrapping - no paper, stickers, die cuts, etc., - horrors!! - but I find I can be even more creative with digital than paper.

-I can shop for paper, page kits, etc., 24/7; all are downloadable; I receive them within seconds – talk about instant gratification!
-Scrap anywhere!! Very portable – just take a laptop and you have it all – photos, supplies, and pages just waiting to be created!

Less time, less mess, less money. . . .
More flexibility. . . .
Easy to share. . . .

Saturday, October 10, 2009

Creating Subfolders

You've now created files on your computer for the year you're working on and monthly folders inside. It should look something like:

2009
01
02
03, etc.

By adding subfolders to each month, it makes it much easier to locate the photo you're looking for. For example:

2009
01
Gregory's Birthday
Gram's Trip to Utah
Nature Photos

Naming subfolders is quick and easy and will save you LOTS of time down the road!

NEXT POST: ADDING TAGS OR KEYWORDS TO YOUR PHOTOS - FUTURE GENERATIONS WILL LOVE YOU FOR DOING THIS!